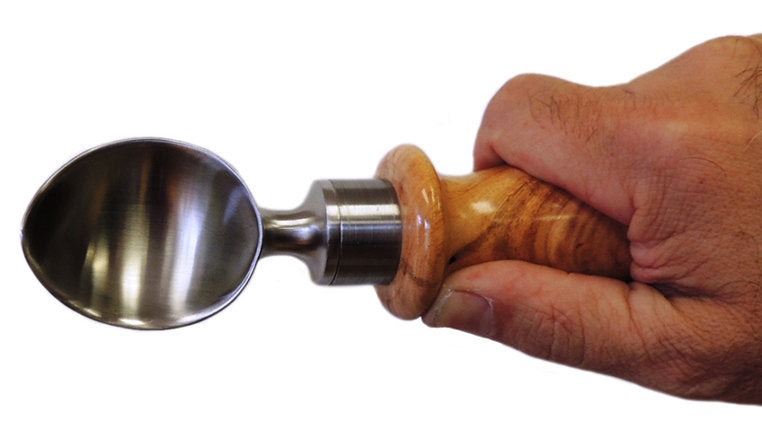
Woodcraft’s new stainless steel ice cream scoop is sure to be a great addition to your kitchen utensils. Adding your design shape and material type to complement your kitchen is up to you! Woodcraft has a huge selection of exotic and domestic wood to choose from for this fun and easy project. We’ll walk you through how you can make your very own ice cream scoop handle with just a few hours of your time. Woodcraft has all of the components you will need to build this ice cream scoop. Let’s begin by purchasing the NEW Stainless Steel Ice Cream Scoop Kit, Woodcraft Item #153928.
 Next, I chose a Curly Cherry Wood (2x2x6 block). I chose this wood because of the marbled grain and color details. Our Product Development Manager and wood guru, George Snyder brought this upcoming product to my attention, so I thought it would make a great choice coupled with the new scoop.

Finding the Centers
I marked my centers at each end of the wood block with the ZERO ZERO Center Finder from Woodcraft, Item #02J14. I like this item because of the see-through visibility to easily find the center accurately by creating lines made from each of the wood block’s 4 corners. I proceeded to punch the center by using an automatic center punch.Drilling
Now it’s time to start creating some sawdust starting with the drill press. Using a machine tool centering bit, I drilled into the pre-punched center mark for the threaded rod hole to be drilled next.


Lathe Setup
Pre-measure how much drill length you will need and give yourself another 1/4″-1/2″ depth so you do not bottom out during assembly later, by marking the drill bit (shown left above) with painters tape.
Insert the WoodRiver keyless chuck, Woodcraft Item #152678 loaded with the 23/64″ drill bit into the headstock.
Hold the block of wood firmly against the WoodRiver 60 Degrees Ball Bearing Live Tailstock Center with #2 Morse Taper. Woodcraft Item #149168, located in the tailstock. Using approximately 250-300 RPM spindle speed, drill into the pre-drilled center hole of the wood block by controlling your wood block, fed into the drill bit with the tailstock spindle as your driving force into the drill bit at a slow pace.
After drilling to the pre-measured depth, replace the keyless chuck with a 7/8″ diameter, #2 MT drive center.
Center the wood block non-drilled hole end to the drive center in the lathe headstock. Hold it firmly as you move the tailstock live cone center into the drilled hole end of the block until the wood is firmly held between the two centers. You are now ready to turn.


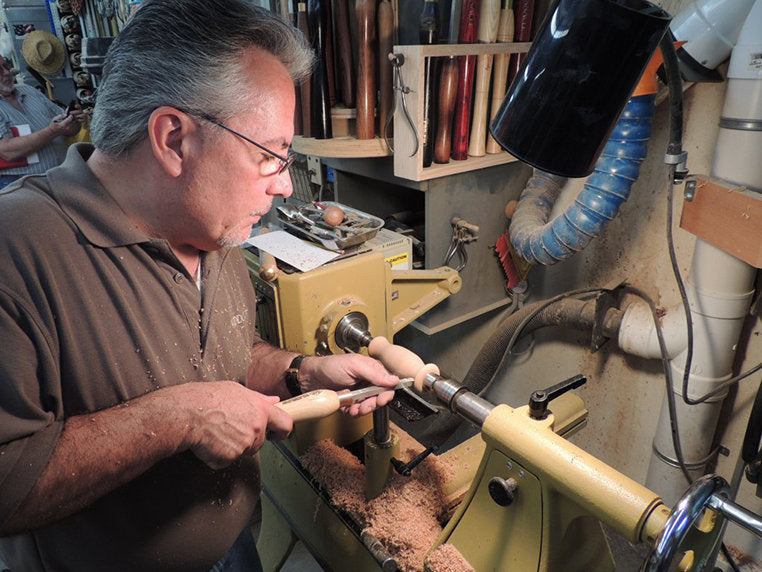
Rough Turning the Handle
I placed the tool rest at the correct height for using a spindle roughing gouge. Choose the one that you prefer as size is not critical. I started shaping the square form into the desired diameter.


Tenon Cutting & Ferrule Fit
Once I had the round completed, I began cutting the tenon for the ice cream scoop ferrule. Turning down to a press fit diameter is a slow and critical process with many stops and checks to be sure you get the right fit. Remember, once you take material off, you cannot add it back on!


Finish Turning the Handle Design
The design shape is purely left to your ideas and imagination. I wanted something that would be a sculpted fit in my hand when using the scoop with a thumb press fit while scooping the ice cream. Once your conception is realized, you can draw it on paper and transfer it onto the wood or just wing it, as I did! I marked an approximate line as to a radius center for the thumb fit,as shown below.


Sanding
I proceeded with sanding using the Mirka Abranet 2-3/4″ x 8″ Sanding Sheets, 8 piece, Woodcraft Item #150317. Working my way from 80 grit to 400 grit paper, these sheets allow for non-clogging smooth sanding, leaving you with a fine finish.


Finish
After sanding was complete, I used General Finishes Wood Turners Finish, about 8 to 10 coats, leaving a great finish. This stuff dries quickly and allows for repeated coats to be applied. Shine, are you kidding me! Seeing is believing and this stuff really works well!
Bottom Design – Drilling & Turning
We’re not quite done yet! The handle end (left side) has left a center hole and surrounding marks in the wood where the drive center is positioned. I’ll need to face it off or come up with a finish design for that end.Rosewood Button Plug
Use your imagination for the bottom end design like a coin, marble insert, or perhaps a contrasting wood piece to accent or offset the darker lines in the cherry will give this handle just the right look. I decided on a contrasting piece by creating a Rosewood accent button plug. But first I needed to make the plug hole in the bottom of the handle. Using a 3/4″ diameter Forstner Bit, Woodcraft Item #147069.


Gluing & Assembly
Glue the button plug to the handle bottom and the ferrule to the tenon using Titebond II Wood Glue, Woodcraft #Item #08L43 and press fit both ends with a vice, protecting both sides of the handle.


The last step to perform, time for some ice cream!
Now that you know how to make this project, get to your local Woodcraft store for your ice cream scoop and supplies. Have fun and be sure to share your ice cream scoop designs (and your favorite ice cream!) right here on the Woodcraft Adventures Blog & Gallery.